1 Pre-Installation Steps
1.1 Pre-Installation Software & Package Requirements
- Installed Node.js Version, this can be found by running the command “node -v” from the Windows command terminal – We recommend Node.js 64bit Version 10.21.0 or later, you can install from here: https://nodejs.org/en/download/
- Port Information
- Dedicated port details for the Node app to communicate with the extension. This port should be opened on the server (ex: 4000)
1.2 Qlik Sense Certificates
- Export certificates from the Qlik Management Console
 Go into the Qlik Management Console and into the certificates tab
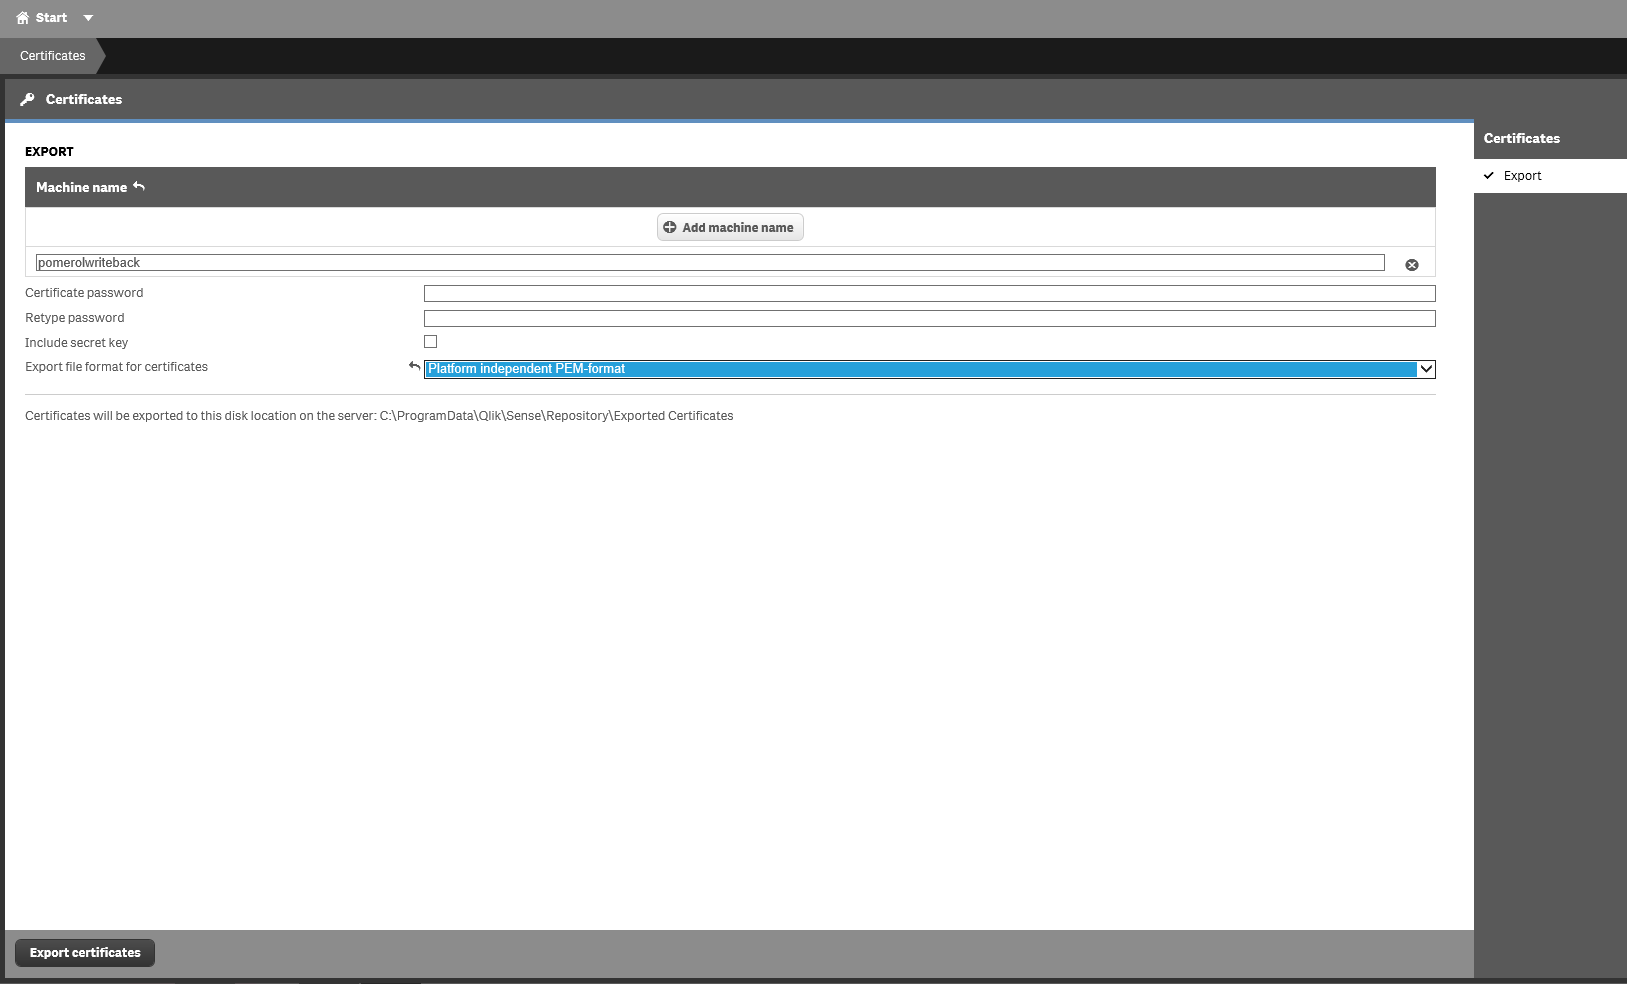
- Click “Add machine name” and type “Pomerol Writeback” on the text box
- DO NOT add a password or Include the secret key
- Change the File Format in the dropdown to “Platform independent PEM-format”
- Click Export, the certificates can be found on the Qlik Server under “C:\ProgramData\Qlik\Sense\Repository\Exported Certificates”
1.3 SSL Certificates
The following steps are required to set up SSL on the server for the QSWE backend if one cannot be provided by IT:
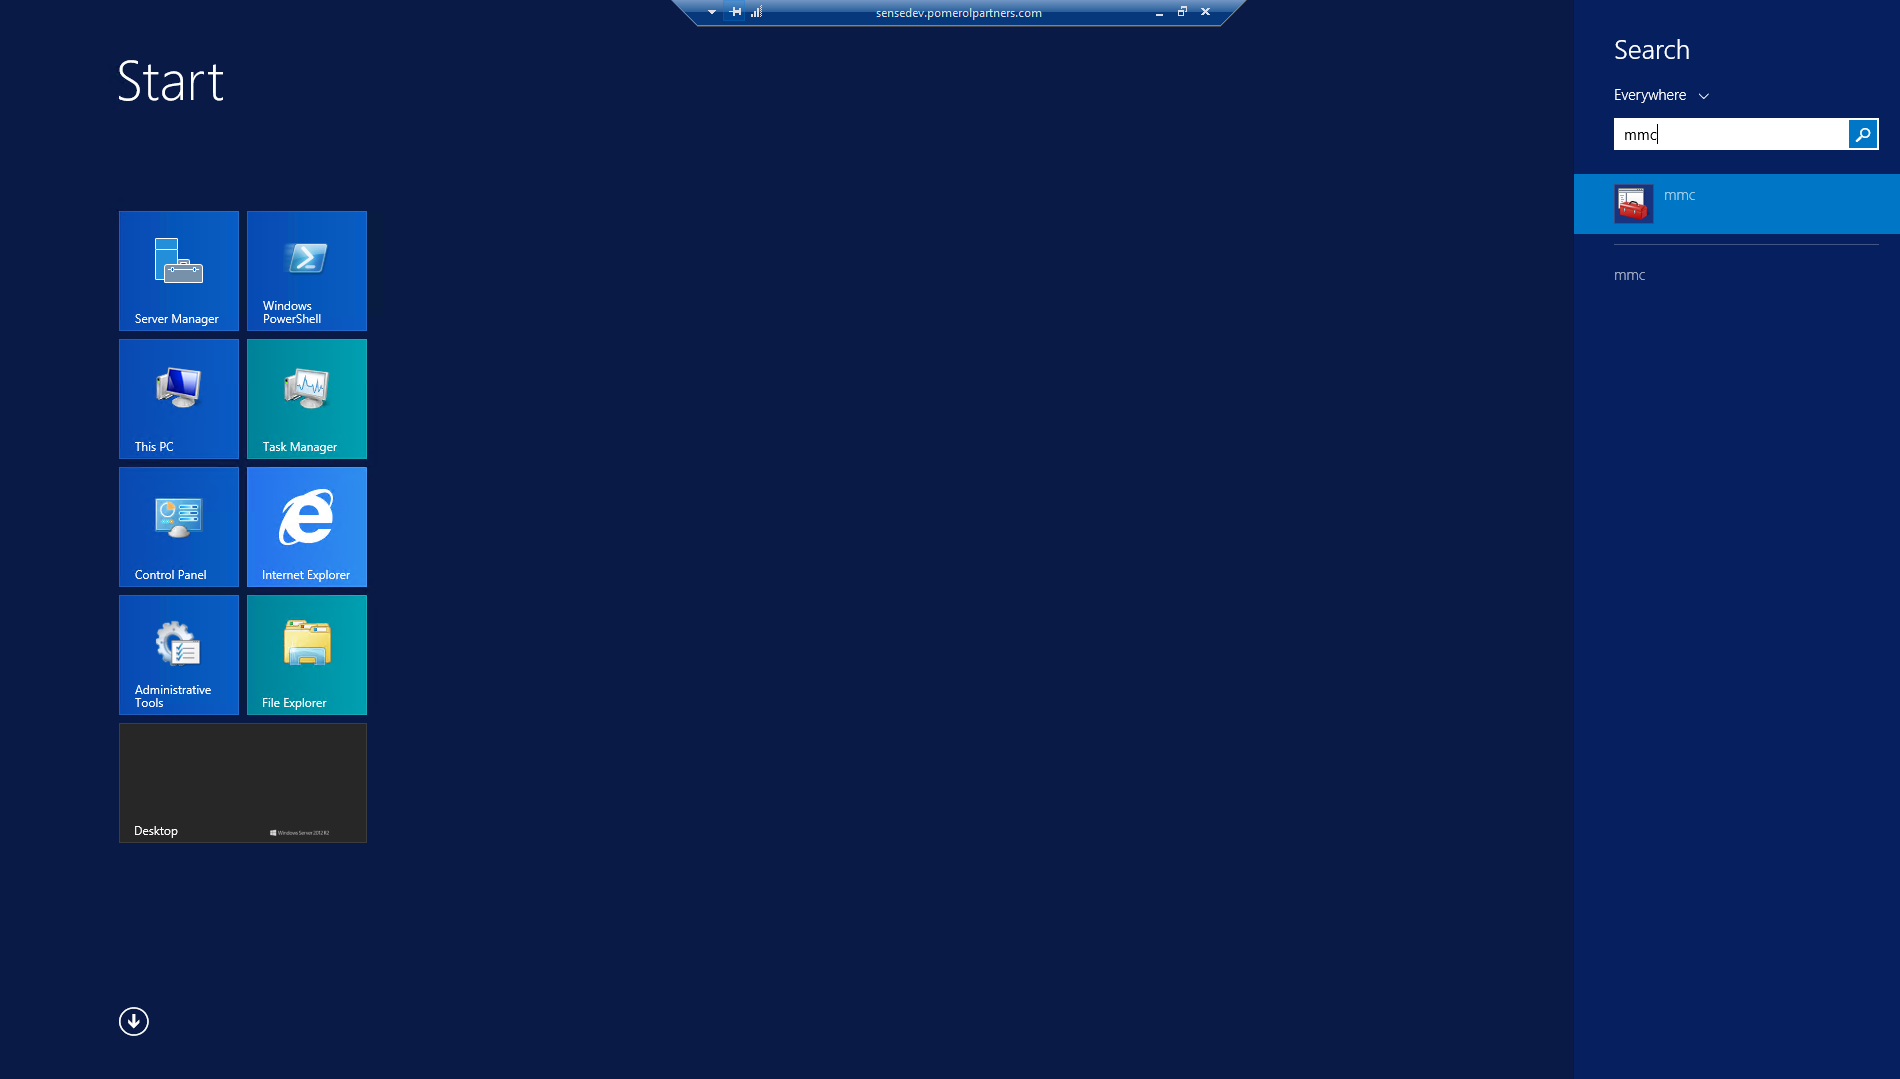
- In the search bar type mmc and select the “Microsoft Management Console”
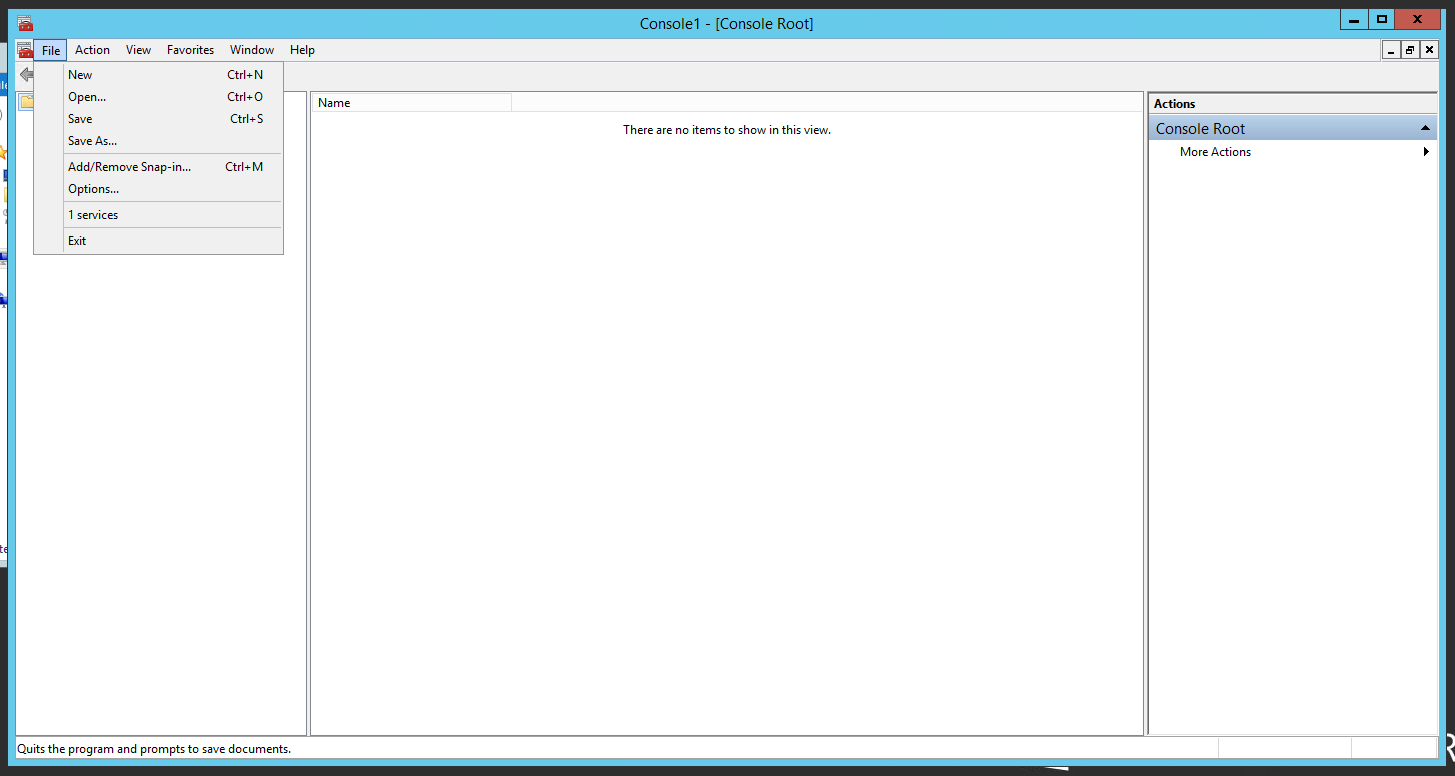
- Go to File > Add or Remove Snap-in;
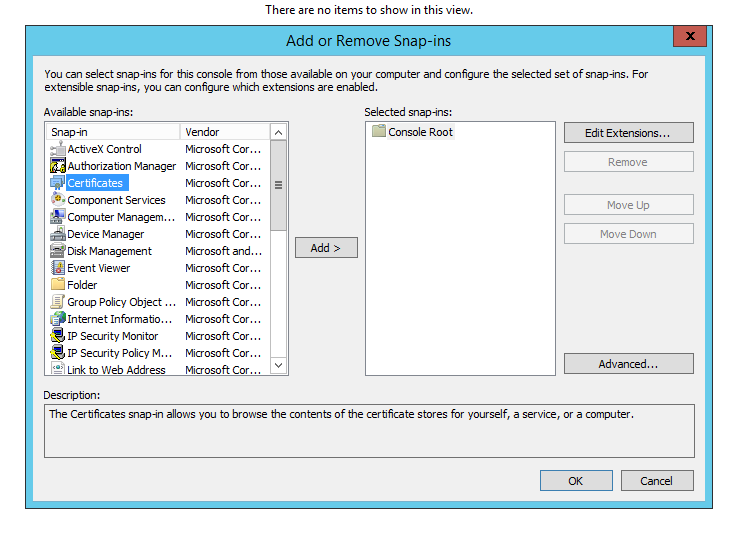
- Then Select Certificates; Then Add >
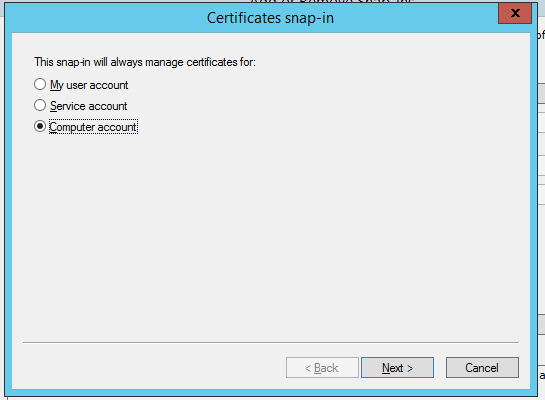
- Select Computer Account and click “Next”
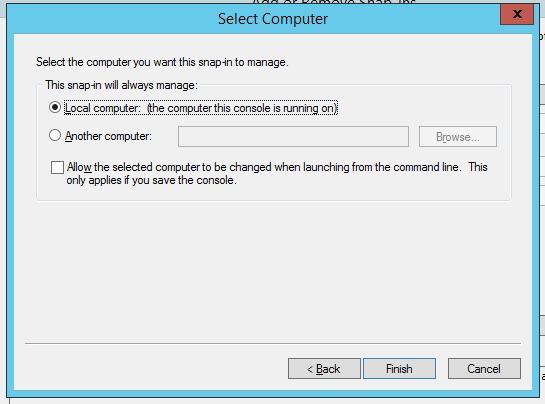
- Select Local Computer and “Finish”
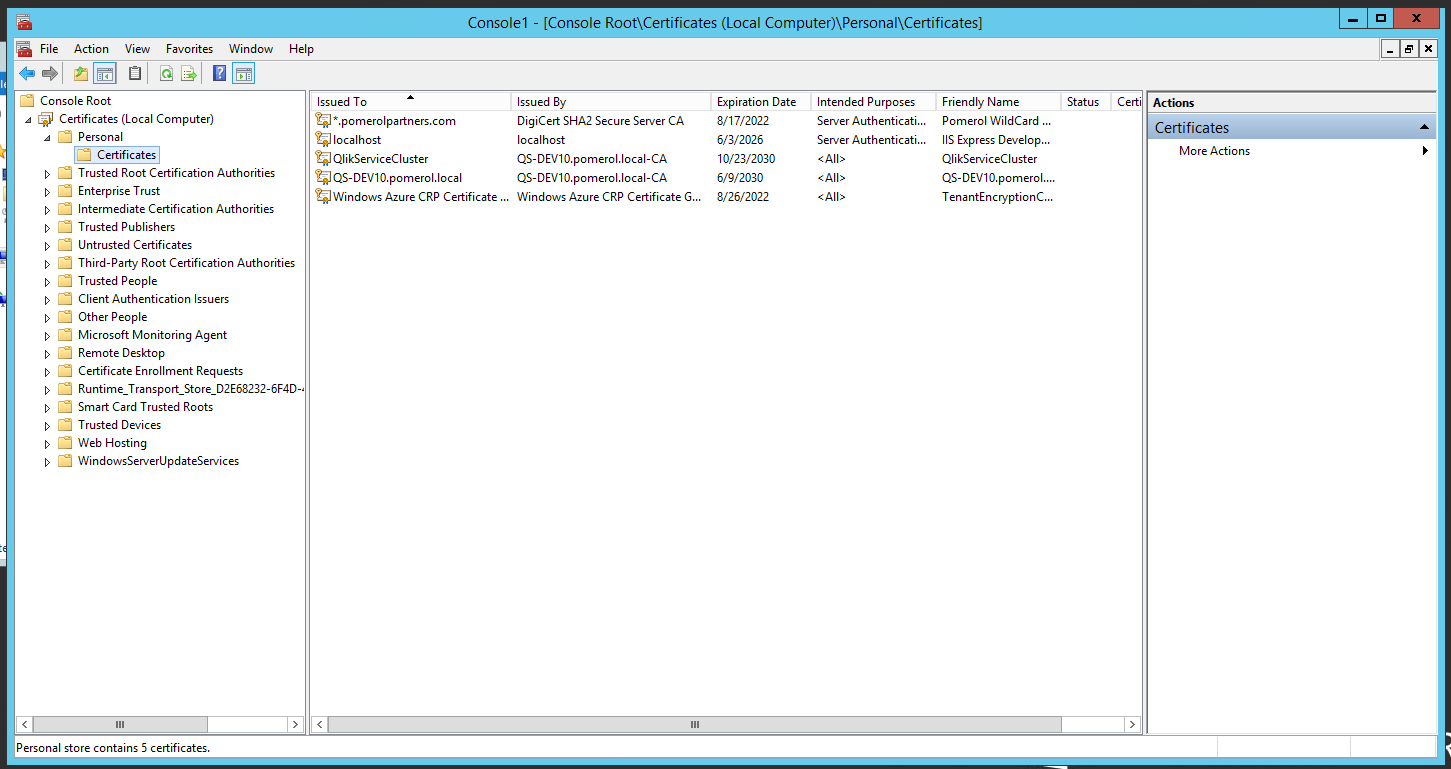
- Now you can see your certificates
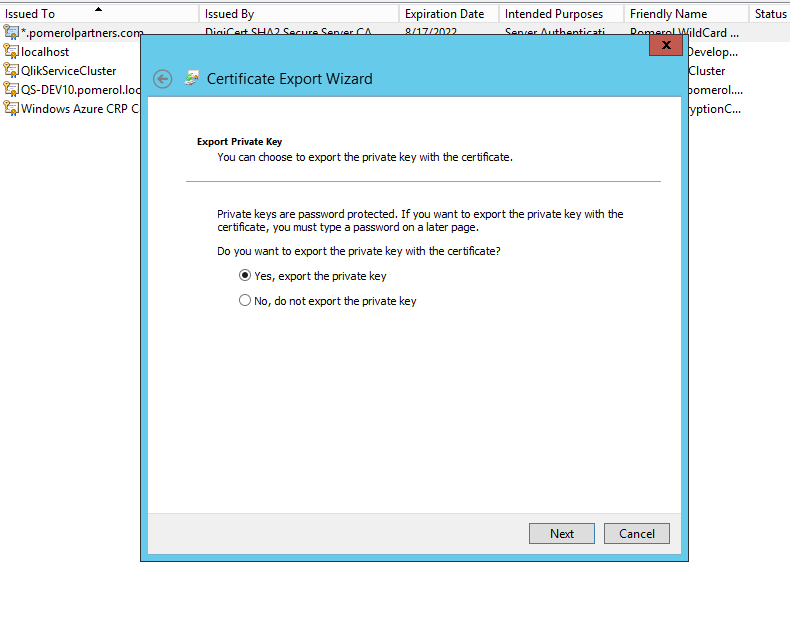
- Right click on the ssl certificate, then go to “All Tasks” and select “Export”, after that in the window that opens select “Yes, export the private key” and click “Next”
- From the new menu select the “Personal Information Exchange” option and click “Next”
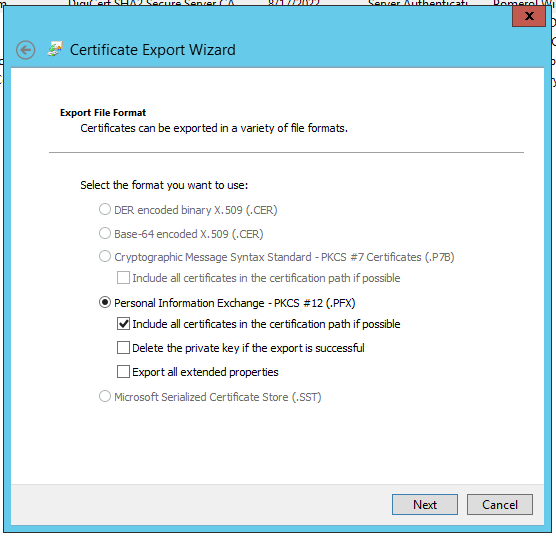
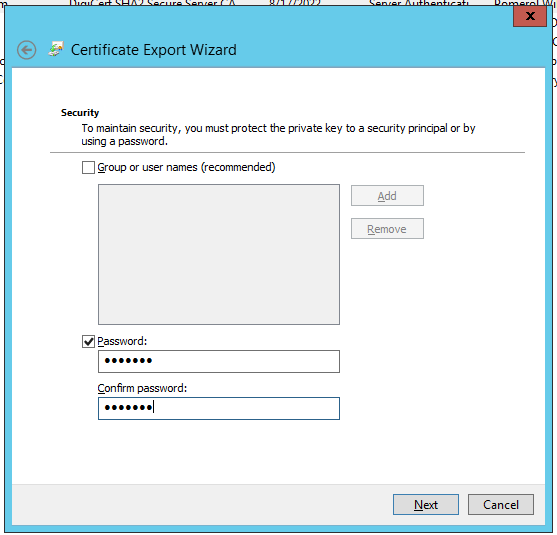
- Now select the “Password” checkbox and choose a password for the certificate, and click “Next”
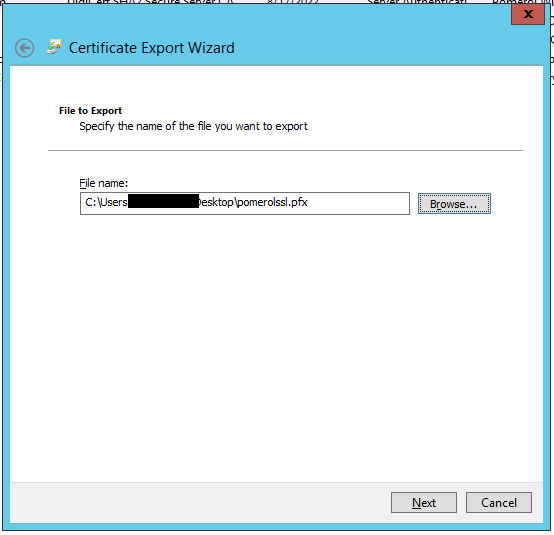
- In the next step there is a place to choose the filename, click on the “Browse” option and another window will open to choose a place to store the file and add the certificate name, after that click “Save” and the new window should close, back on the “Certificate Export Wizard” the chose location and filename should appear similar to the following picture, to finish click “Next”, now you successfully created this certificate.

2. Installation Procedure
2.1 Backend Installation Procedure Steps
2.1.1 Running Installation Package, apply the writeback license and setup the configuration file
- You will receive 3 files from Pomerol to install the Writeback Extension
- The PomerolInstaller
- The pomerolwriteback extension zipped
- And the license folder zipped
- At this point you should have the 3 files that you received from Pomerol plus the Qlik Sense certificates generated in step 1.2 and the server ssl certificate generated in step 1.3.
- Double click on the Pomerol Installer to start.
- After the installation starts click “next”.
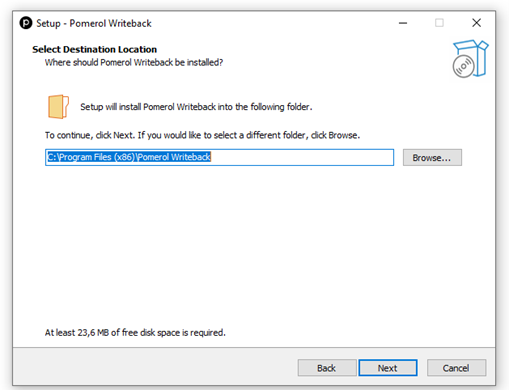
- Select the destination where the Pomerol Writeback should be installed and click “next”.
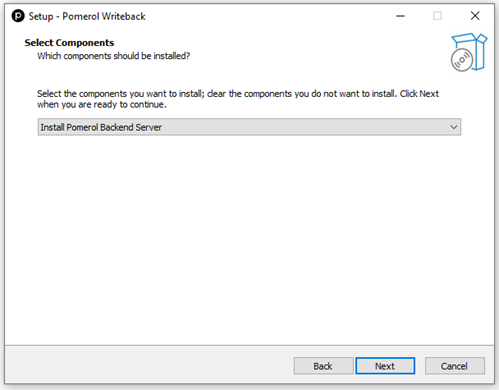
- If it’s the first time installing select “Install” in the dropdown, and then click “next”.
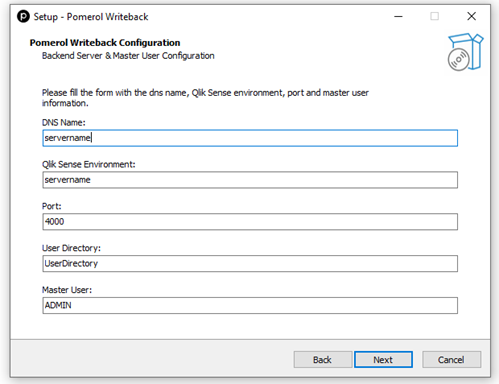
- Fill the form with the information for the Backend Server and the Master User Configuration, and then click “next”.
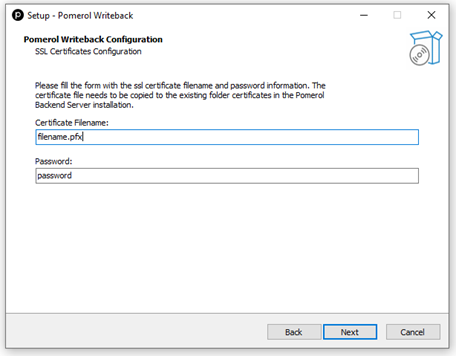
- Fill the form with the information for the SSL Certificates Configuration, use the name of the server ssl certificate and the password used when the ssl certificate was created in step 1.3, after filling the form click “next”.
- Click “Install” to finish the installation.
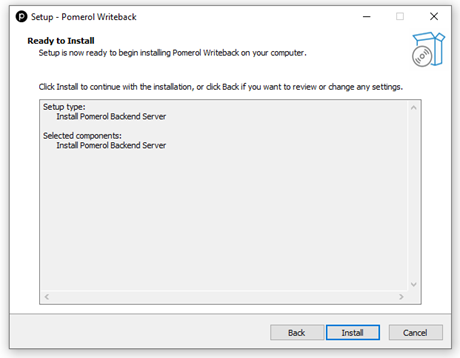
- Click “Finish” and the installation part is done.
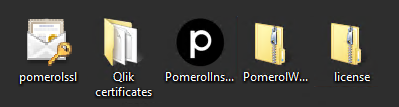
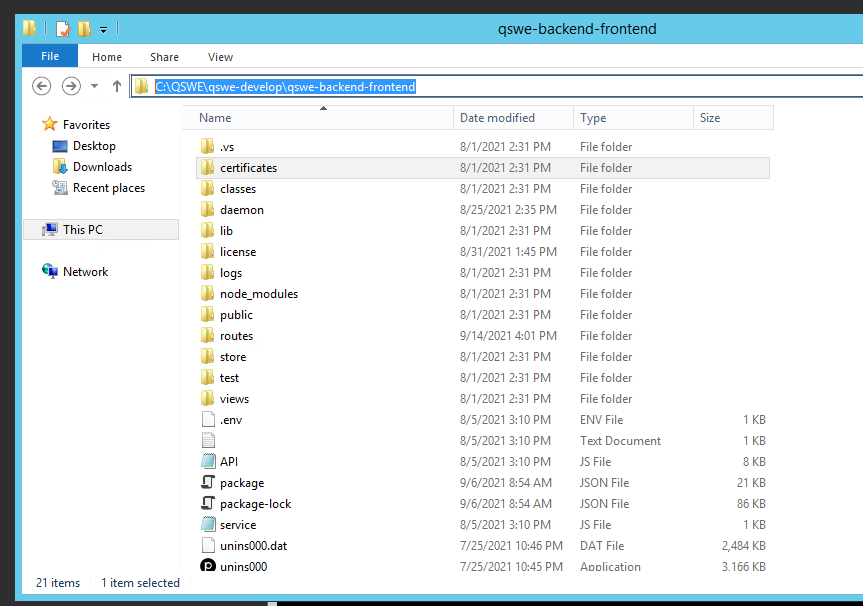
- Open the folder selected for the installation, and you should see the following files:
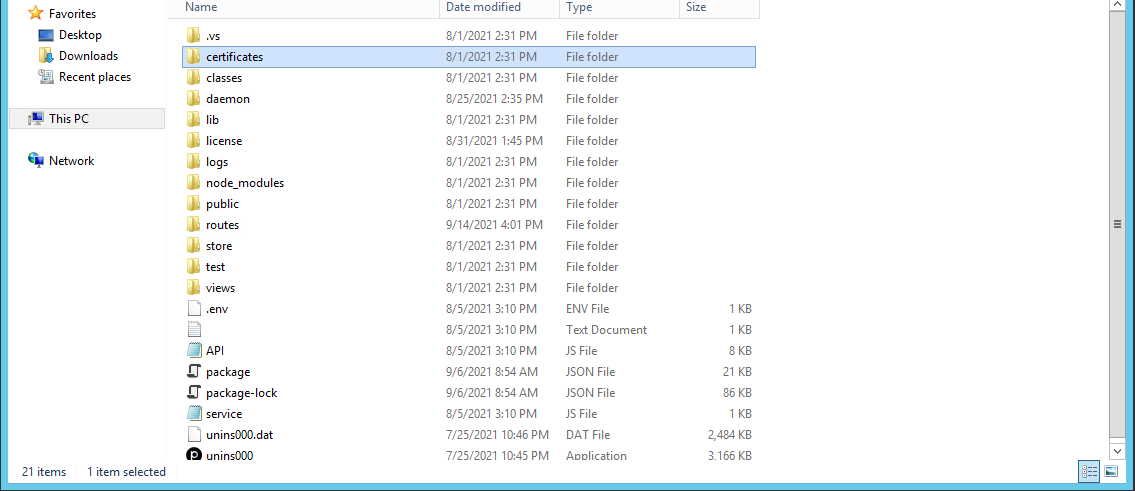
- Note: The predefined location for the installation files is “C:\Program Files (x86)\Pomerol Writeback”, you can go to this location by copying it to the file explorer location bar.
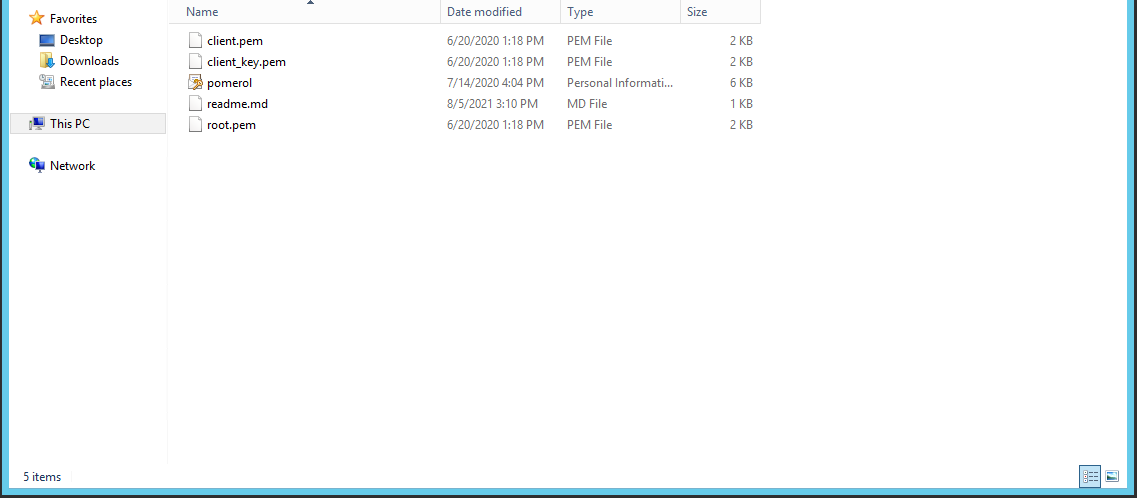
- 10. Go to the “certificates” folder and move to this folder the server ssl certificate created in step 1.3 and from the Qlik Certificates folder created in step 1.2 the following 3 files:
- Client.pem
- Client_key.pem
- Root.pem
- The certificates folder inside the Pomerol Writeback installation files now should have the following files:
- Go to the “license” folder that exist in the Pomerol Writeback installation files, open the License folder you received from Pomerol and copy the files in there to the “license” folder in the Pomerol Writeback installation files, after that the “license” folder in the Pomerol Writeback installation files should look like this:
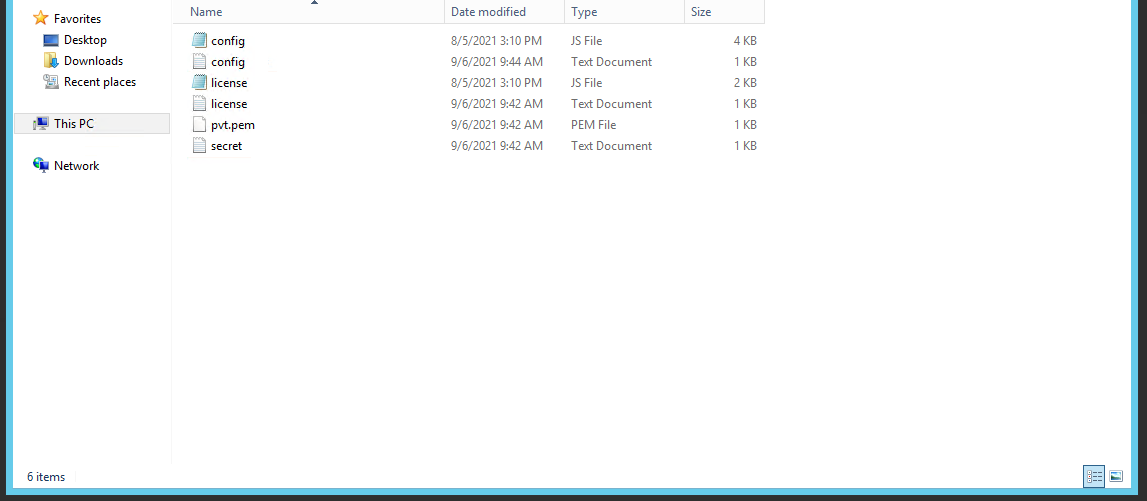
- Note: 2 files were already there, and 4 files came from the License folder you received from Pomerol.
- Now copy the folder path and open the command line, on the command line type “cd” then a space and then paste the file path you copied and click enter, after that type “node service.js” and enter to create the Windows Service that ensures your server is running.
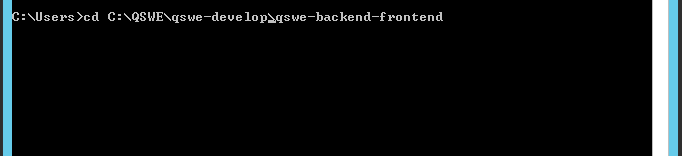

- Note 1: Your file path it’s going to be different from the one in the example.
- Note 2: To paste the file path on the command line use Right click -> Paste, the “Ctrl+v” shortcut doesn’t work on the command line.
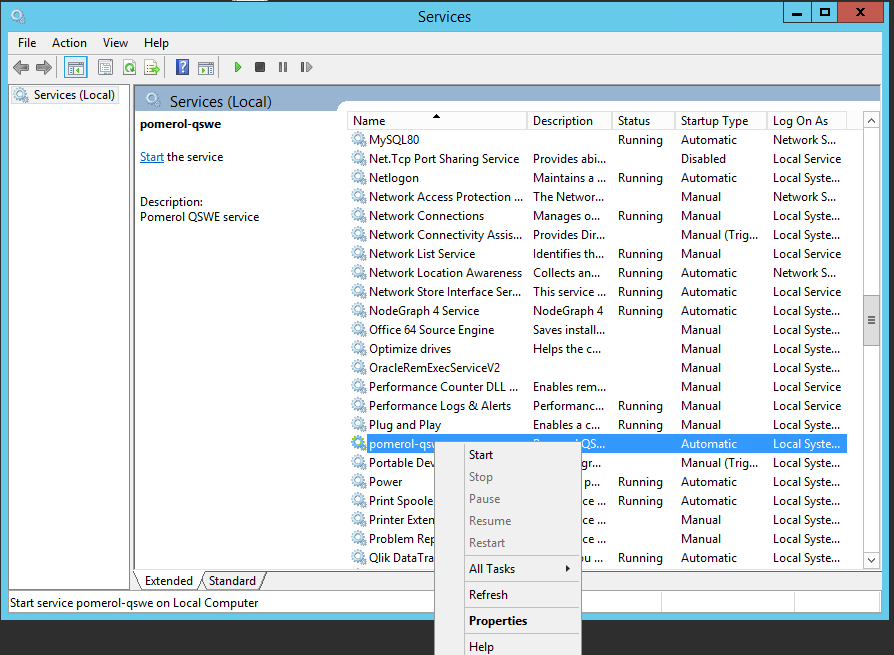
- Open the Services, find the pomerol-qswe service, right click on it and click on “start”.
- Go to the browser and open the Pomerol Management Console, the address is https://server-dns-name>:<server-port-number>/pmc

- Note: In the example image, “sensedev.pomerolpartners.com” was the defined DNS Name and “4006” was the defined port number used during this installation process.
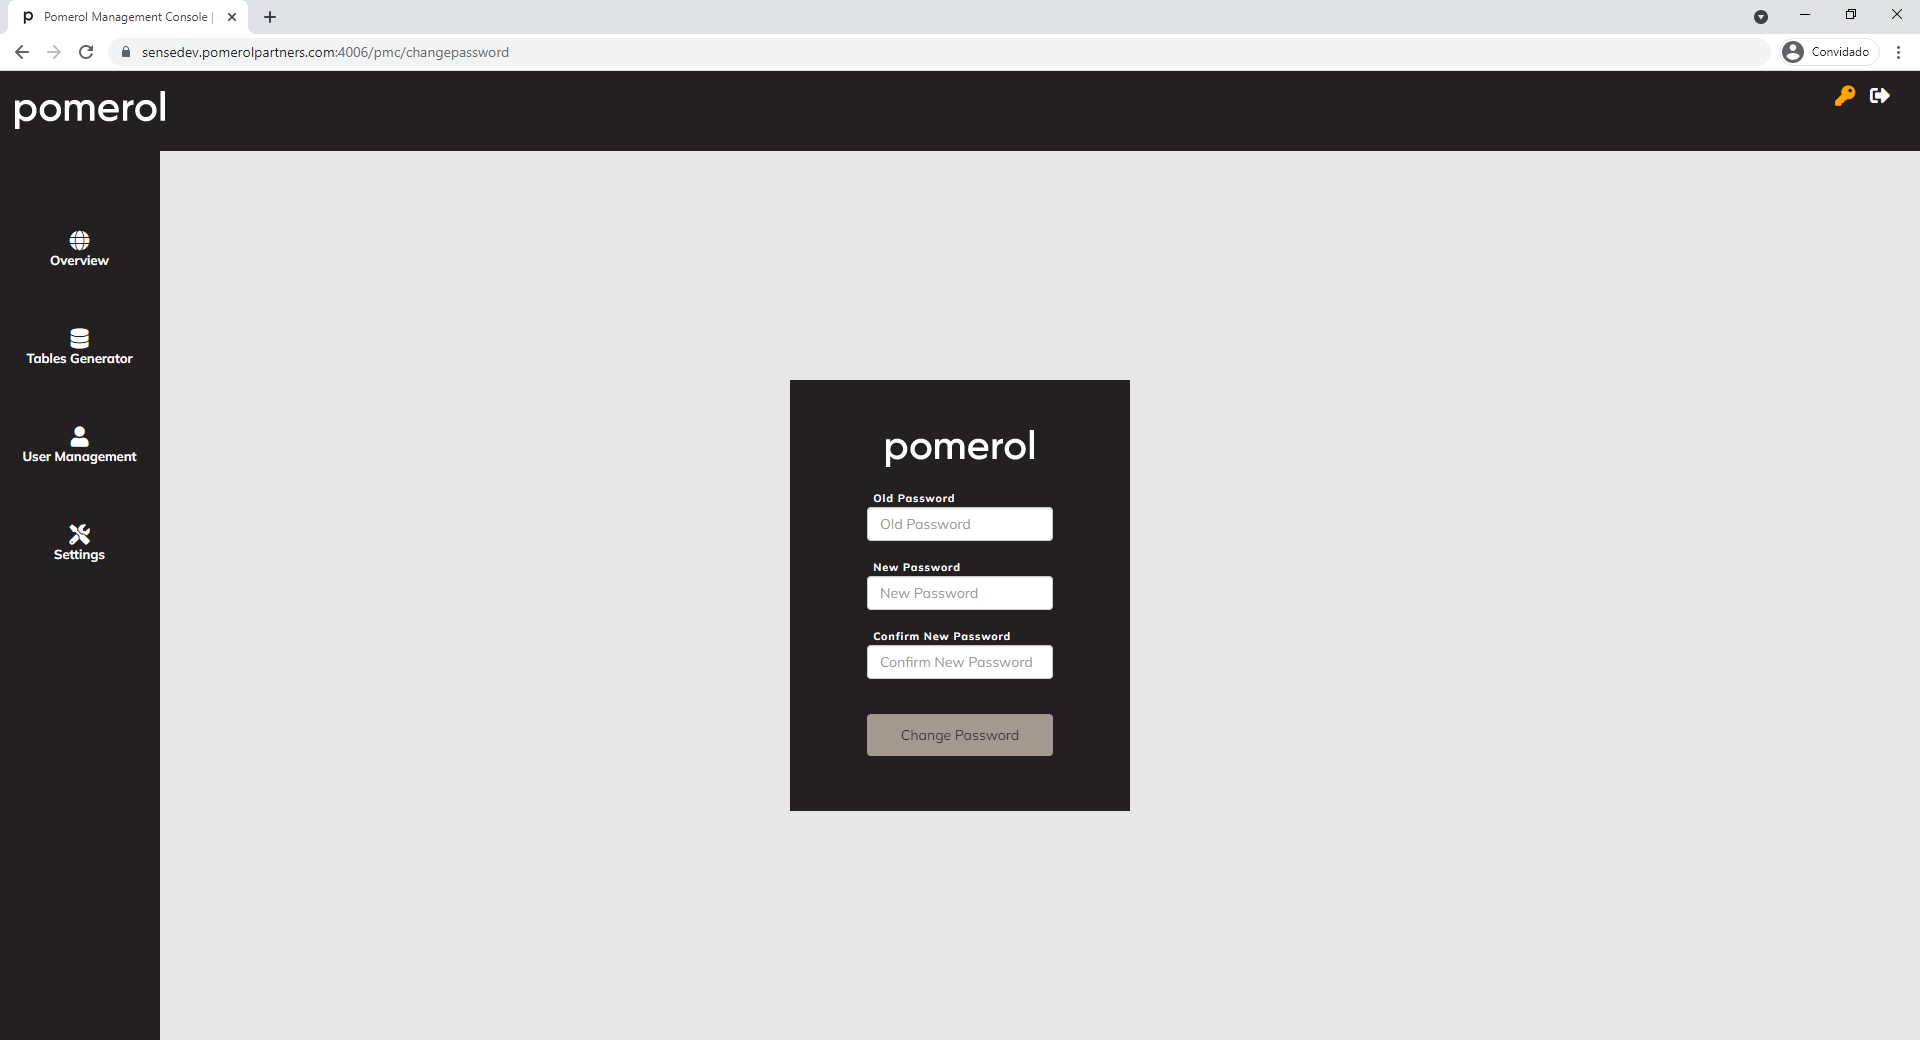
- Login with the Username you choose during the installation process for the master user and the default password can be found inside the .env file on the installation files.
- After you logged in you should see a form to change the password, proceed with that.
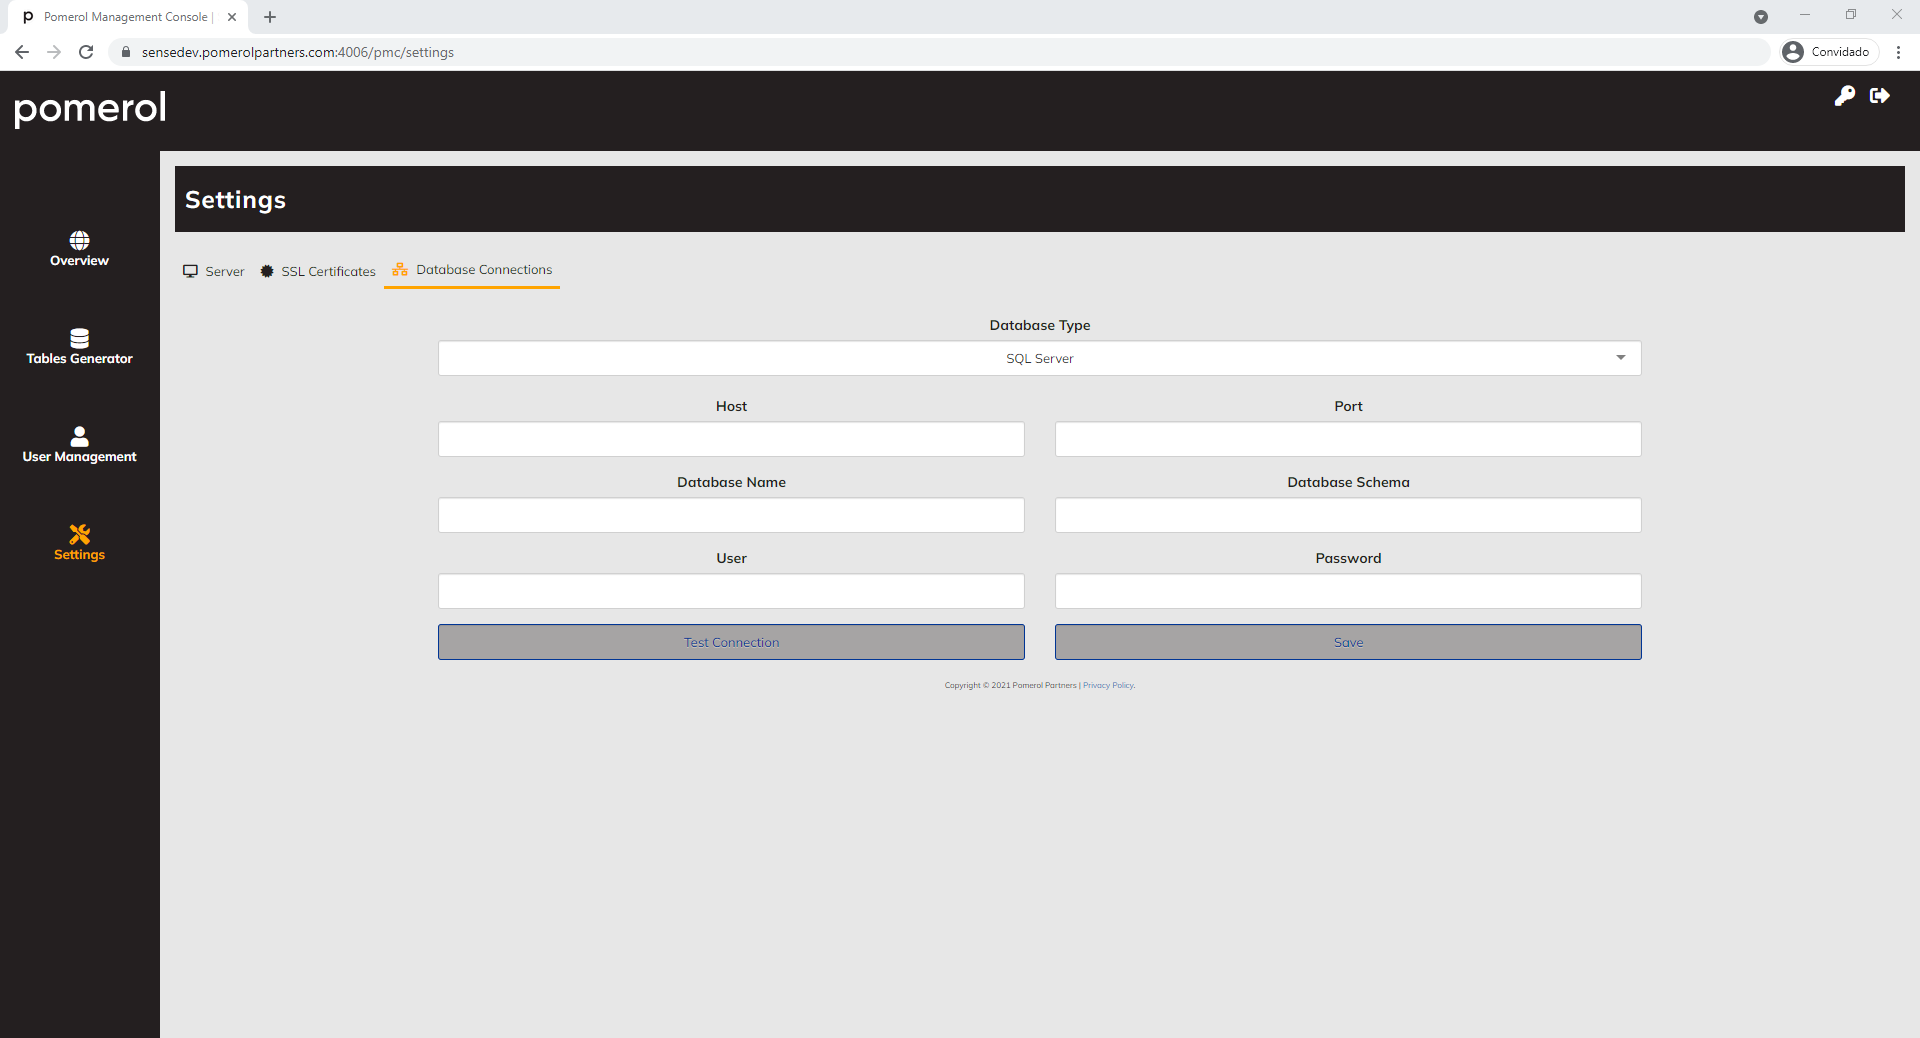
- Go to the “Settings” and then “Database Connections” and fill the form, after that click “Test Connection” and you should see a success message, after that click on the “Save” button.
Congratulations! You have finished installing the Writeback Backend!